Friday, April 8, 2016

Dwarf Fortress 40_24 Tutorial: Step 1 - Setting up Lazy Newb Pack for the First Time

So you just downloaded the "Lazy Newb Pack" and you're going to try out this crazy Dwarf Fortress game you've heard so much about. You could just dive right in, open the "Lazy Newb Pack" Launcher and click "Play Dwarf Fortress" but since you are new to all this lets maybe take time to tweak some settings and set up the Sound Sense App.

Aquifers

The first thing you'll want to do is turn Aquifers off. Why? Because aquifers are a royal pain to work around even for experienced Dwarf Fortress players.

Tile Set

The second thing you'll want to do is select a graphics pack / tile set to either Pheobus or Ironhand. Why? Because if you don't you'll be looking at flashing numbers, letters, and strange symbols instead of pictures and shapes that are easy to decipher.

Sound Sense

The final piece you'll want to set up is Sound Sense. Why? Because it gives you sound and background music. Without it you get 1 track that loops over and over.

  • Click 'Play Dwarf Fortress'. Let the game load. Then quit as soon as you reach the title screen. This will create a gamelog.txt file that you need for the next step.
  • Open Sound Sense App, you will either be prompted to or have to manually tell the program that it needs to have the gamelog.txt file. It is located inside the Dwarf Fortress folder inside the Lazy Newb Pack folder.
  • Update Sound Sense. It will start downloading all of the audio files. This may take a few minutes.
  • Now that Sound Sense has the path to the gamelog.txt file and is fully updated all you have to do is ensure the app is running in the background and you will have sound and music while playing Dwarf Fortress. 

Stone Sense / 3D Map

Make sure Stone Sense and every option that gives you a 3D map simulation is turned OFF. Why? Because Dwarf Fortress is not made to be played using a 3D engine. This is a gimmick that will get in the way. Play around with it later if you like but turn it off for now.

(Optional Settings)

  • Population Cap – If you encounter lag while playing then you may want to reduce the population cap to 100 or even 50.
  • DF Hack – A series of useful mods that make many of Dwarf Fortress's more tedious tasks (navigating lists, assigning tasks) less tedious while also adding powerful tools for maintaining inventories. These can be turned on or off in the Lazy Newb Pack launcher. You do not need them but having them on won't interfere with the tutorial.
  • Dwarf Therapist – A useful app for manually assigning jobs to your dwarves. Not necessary for now but you will need it later. 


Everything is configured. You are now ready to start Dwarf Fortress.

Continue on to Step 2: Creating a World for the First Time

Dwarf Fortress 40_24 Tutorial: Step 2: Creating a World for the First Time

So, you've downloaded Dwarf Fortress Lazy Newb Pack, you've sorted out Sound Sense and now you start up the game. You will notice that the mouse doesn't work here so it's going to be keyboard from here on out.

The first thing you need to do is create a world to build your fortress in. These worlds are dynamic and each event for each year of the history of the world is recorded and plays a part in shaping all the events that follow. This means that if you're computer is a little slow you should consider building a smaller world with a shorter history.

Here's the settings you should use for your first few forays into the world of Dwarf Fortress…


World Size 


  • Choose nothing larger than Medium 
  • How big the world is. Actual size does not matter except for processor power of your computer. 


History 


  • Choose Short or Medium 
  • How long the world evolves before you begin playing. This will give some time for the world to evolve and civilizations to grow thus giving you better trade options late on. 


Number of Civilizations 


  • Choose Medium 
  • How many nations of Dwarves there are at the start of your embarking. Not overly important for your first play through. 


Max number of Sites 


  • Choose Medium 
  • How many places the civilizations of the world can settle. Not overly important for Fortress mode. 


Number of Beasts 


  • Choose Low or Very Low 
  • How many Forgotten Beasts are generated at world creation. These are big scary end boss Fortress Slaughtering monsters that you don't want to encounter on your first play through. 


Natural Savagery 


  • Choose Low or Very Low 
  • How difficult the world is to settle. A higher savagery rating increases the amount of aggressive animals (and monsters) that your Fortress will have to contend with. 


Mineral Occurrence 


  • Choose Frequent 
  • The amount and variety of useful minerals (Rock types, metals, gems) that spawn per zone. 


You can have multiple worlds created at any time but only one fortress per world. If your fortress is destroyed or if you choose to abandon it you can continue on in that world with a new fortress adding further to the history of that world.


More information at: http://dwarffortresswiki.org/index.php/DF2012:World_generation


Continue on to Step 3: Embarking for the First Time

Tuesday, April 5, 2016

Dwarf Fortress 40_24 Tutorial: Part 3 - Embarking for the First Time

Phase 1 - Where to Settle?

What am I looking at and how does it work? 

Time to choose a location in the world to build your fortress. The embark screen you are looking at might be a little confusing at first. There are 3 maps in front of you, a local map, a regional map, and a world map. You can move around the regional / world map by using the arrow keys and you can move around the local map by using the 'hk/um' keys.

You will also notice a series of descriptions to the right of these maps that give you some basic information about the area you are currently looking at. You can cycle through different levels of information by pressing tab. Play around with these options for a while.


How do I find a good place to settle? 

Thankfully Dwarf Fortress has an 'site finder' function that highlights areas of the map which are favorable according to the criteria you give it. Lets use it now to find a good spot by pressing [f]

Here are the settings you will want to look for and a brief description of what they are.


X Dimension 

  • Choose 4 
  • Range is 2 to 16 
  • This setting controls the initial size of the embark rectangle. The finder searches the world map for the selected features using a rectangle of the selected size. A larger rectangle will usually lead to a higher chance of finding all selected features due to the site being larger, but will impact game performance (the larger the rectangle, the lower the FPS). 


Y Dimension

  • Choose 4 
  • Range for either: 2 to 16 
  • This setting controls the initial size of the embark rectangle. The finder searches the world map for the selected features using a rectangle of the selected size. A larger rectangle will usually lead to a higher chance of finding all selected features due to the site being larger, but will impact game performance (the larger the rectangle, the lower the FPS). 


Savagery (Lawful vs Chaotic) 

  • Choose Low 
  • How unruly is the natural wildlife. (Low = bunnies and deer, High = Giant Grizzly Bears and Insect men) We set it to 'low' so that you don't encounter dwarf eating monsters or early goblin raids until at least a few game years in.


Evil (Good vs Evil) 

  • Choose N/A 
  • Biomes can have alignments that are either Good, Neutral, or Evil. Good aligned biomes have delicious berries and unicorns. Evil aligned biomes have freakish weather and undead things. Neutral aligned areas are normal with normal animals. We set it to N/A because other settings mess up the site finder. 


Elevation

  • Choose N/A 
  • Low = Flat, Medium = Hills, High = Cliffs + Mountains. We set it to N/A because elevation doesn't make any difference to us. 


Temperature 

  • Choose N/A 
  • Low = Freezing / Cold, Medium = Temperate / Warm, High = Hot / Scorching. We set it to N/A because other settings mess up the site finder. 


Rain 

  • Choose N/A 
  • Selects the amount of rain / snow. We set it to N/A because we don't care about this. 


Drainage 

  • Choose N/A 
  • Can be used to determine specific terrain types. High = Deserts / Glaciers, Low = Swamps and Marshes. We set it to N/A because we don't care about this. 


Flux Stone 

  • Choose N/A 
  • Flux stone is used for the production of steel. We set it to N/A because making steel is an advanced feature and you are still learning the basics. 


Aquifer 

  • !NO! NO NO NO NO NO
  • Aquifers represent layers of underground water that are extremely difficult to work with. They will flood your fortress and they require advanced skills to break through. You do not want one. 


River

  • N/A 
  • Rivers can be nice but they are not required. They are an endless supply of water and a near-endless supply of fish. 


Shallow Metal

  • Choose Multiple 
  • Very important. You want multiple shallow metals. 


Deep Metal 

  • Choose Multiple 
  • Also important. 


Soil

  • N/A 
  • How deep the soil is. We don't care. 


Clay

  • N/A 
  • Is there clay here? We don't care. 


Once you have put in your desired parameters start it up and watch the map highlight areas that are ideal for settling. When it is done hit [esc] to browse the map.


Which Spot should I Choose? 

So you've run the site finder and you have some green X's flashing at you on the map. You are looking them over and now you have to choose one. Here are the sort of things you should be looking for and why.

Temperature

  • Warm / Temperate 
  • Temperature affects when water on your map either freezes or evaporates. Ideally you want either warm or temperate settings as this allows for access to overland water and is the nicest setting for your dwarfs. 


Trees / Vegetation

  • Forest / Heavy 
  • Trees are very useful to build furniture, storage barrels / bins, and trade goods. They are also useful as fuel for your metal industry. For your first few play-throughs you will want lots of trees and vegetation. 


Surroundings 

  • Calm / Wilderness 
  • This determines the types of creatures that will visit your fortress. Ideally you want calm surroundings for your first few fortresses. Also ideal (and quite rare) are 'Serene' and 'Mirthful' surroundings. 


No Aquifer

  • As already stated above, you do not want to deal with an aquifer 


Shallow Metals 

  • Very important 


Deep Metals 

  • Also important 


Found a spot that meets your criteria? Awesome! Don't forget you can also use the [umhk] keys to move around the local map.

When you are ready, press [e] to enter the next phase of embarking


Phase 2 - What to Bring? 

Here you are given the choice to use a pre-built set of dwarves and starting resources or to plan it out manually. For the first few times please choose one of the pre-built packs (LazyNewb 2 mine 1 wood 1 mason/craft 1 broker 2 farmer] or something close to that name. After you have played for a long time and understand how the game works, then you can create your own specialized starting kit, but for now the pre-made loadouts are your friend.

Optional - Press [F] to name your Fortress
Optional - Press [G] to name your expedition Group

When you are ready press [e] to embark.

Dwarf Fortress 40_24 Tutorial: Part 4 - The Basics of a Functional Outpost

Basic UI Instructions  

Throughout this tutorial you will encounter letters in brackets (example: [k]) these represent the key you need to press to do the action being talked about. Pressing [esc] takes you back to the main screen.

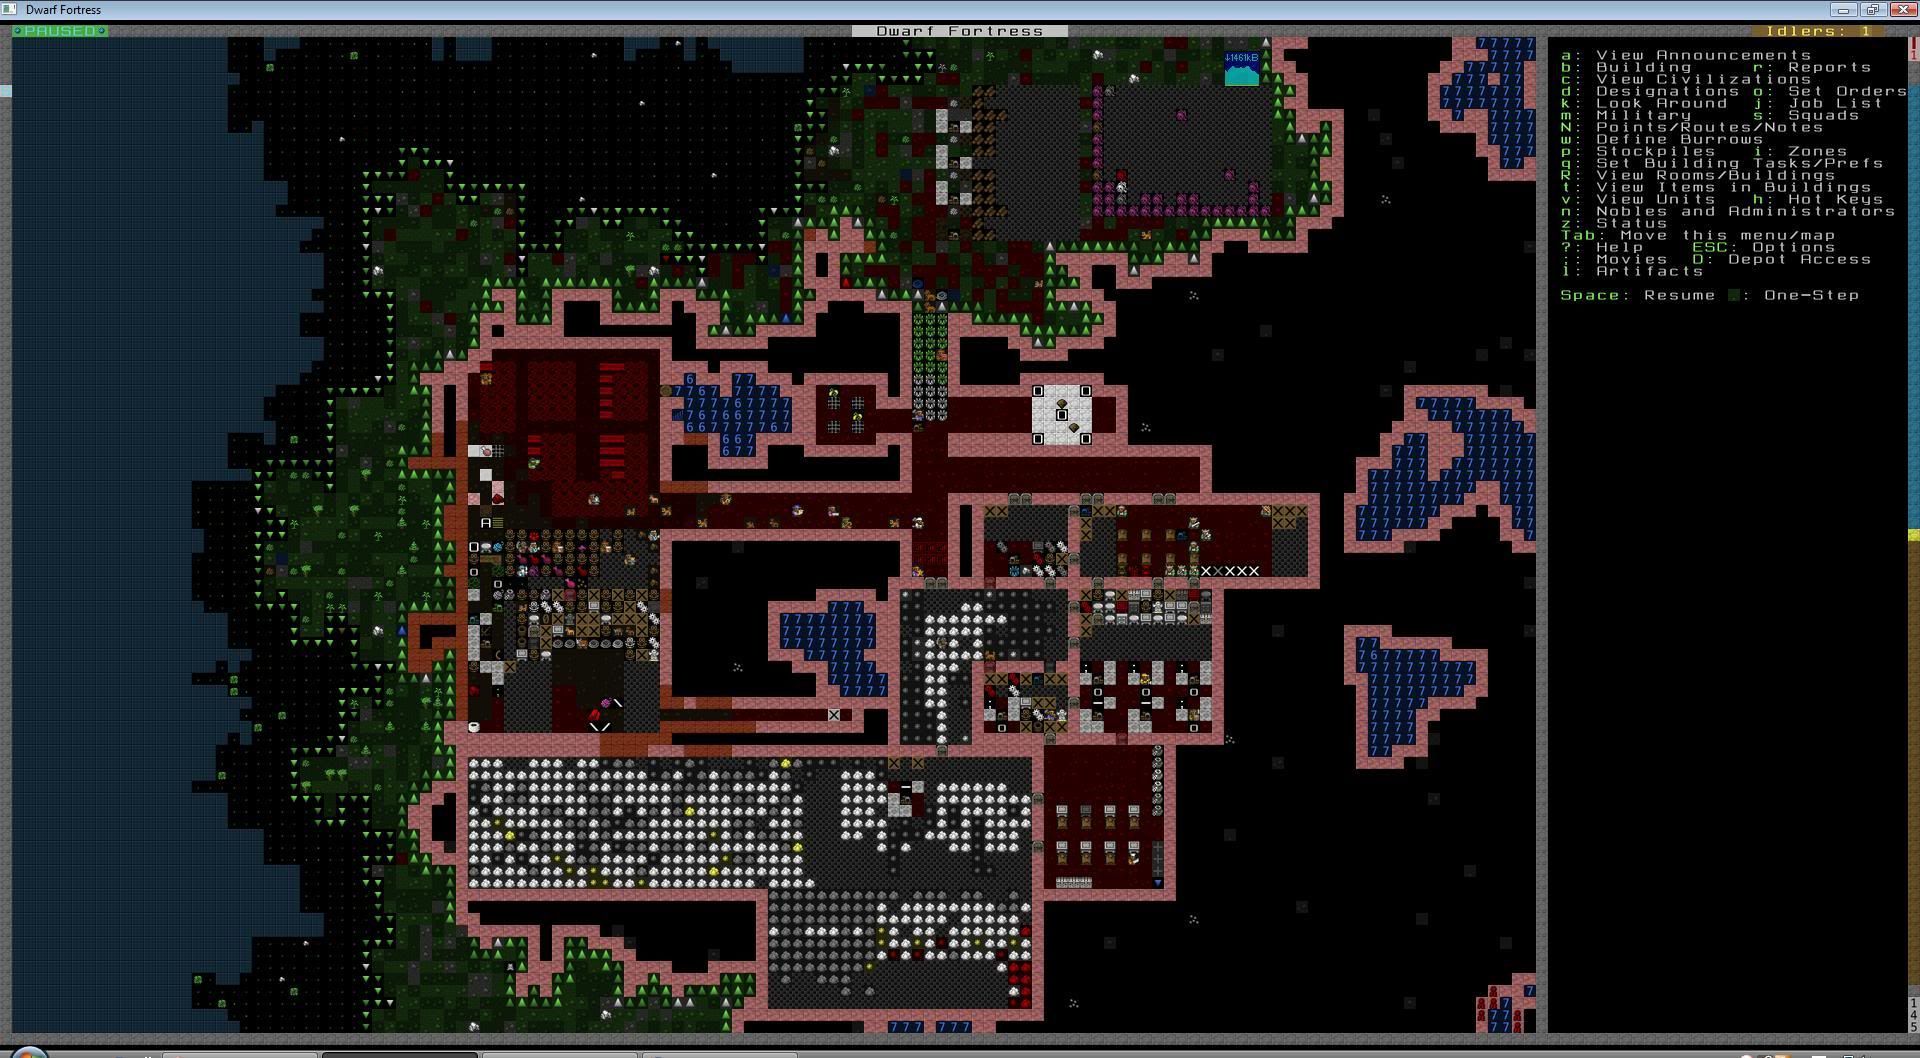
You have embarked! (finally) And arrived at your destination. The game is paused. Take the opportunity to loo[k] around and identify what things are.

Also, pressing [Tab] will cycle through different view modes. Choose the one that you like best.

Finally, use [<] / [>] to go up and down elevation levels

The game will not unpause until you press [Spacebar].


Explanation of Phase 1 

This tutorial will teach you step by step all of the basics needed to create a self sustaining outpost.

Right now your dwarves have enough food and alcohol in the wagon to keep them alive for the first few seasons and they are content to sleep on the ground for a while, but these rations will not last forever. Our first priority in any fortress is to secure the basics of survival and make them self-sustaining.

The most basic layout of any fortress has at least four components to it.

  1. Food Production 
  2. Alcohol Production 
  3. Sleeping Quarters 
  4. A Meeting Hall 


These are the four objectives of Phase 1, but first we need to gather some resources and dig down to where we can begin building.


Step 1 - Gathering Resources 

Lets chop down some trees and gather up some extra food to get us started. Begin by [d]esgnating [t]rees to be chopped down. Then also [d]esignate [p]lants to be gathered. Don't be afraid to make the designation areas decently large, but don't designate the entire map either. When you are done designating press [esc] to go back to the main menu.

Let's also create 2 stock[p]iles. One for [w]ood and one for [f]ood. Don't be afraid to make these stockpiles big. Once again, when you are done creating stockpiles press [esc] to go back to the main menu.

You can press [space] to unpause the game and watch the little dwarfs work. When you are satisfied that the designations and stockpiles are working as they should move on to step 2.


Step 2 - Digging Down 

Lets have our miners start digging down a few layers so that we can store our starting resources and keep our dwarves underground and away from the cold rain, thieving magpies, and hungry predators. Underground = safer than Aboveground.

If you are on a map with elevation changes then you can simply [d]esignate a path to be mine[d] into the side of the hill.

If you do not have elevation changes (and even if you do) you can have your dwarves [d]esignate  one or a few squares to dig steps going down into the level below with [j]. Then, using [<] and [>] move your view down 1 z level. Directly below your stairs going down [d]esignate squares of up / down stairs with [i] (the up / down stairs will connect with the stairs going down directly above them and allow your miners the option of digging down into the level below them).

Clear as mud? Good.

Dig down enough levels that your dwarves find themselves digging into rock and not just soil. Once you have reached some solid rock [d]esignate some rooms to be mine[d].

These rooms will serve as our initial main storage, dormitory, meeting hall, and workshop zone, so they do not have to be too big. When you are satisfied with your layout you may unpause the game and let your little dwarves go to work. You can always change the layout later if you need more space for things.


Step 3 - Carpenters Workshop and Important Furniture Items 

Your carpenter has been busy chopping down trees and the other dwarves have been putting the resulting piles of wood into the stockpile that you created in step 1. Now, let's [b]uild a [w]orkshop for our [c]arpenter beside our wood piles. When our carpenter is finished with his chopping down trees he will come to the build site and construct the workshop.

Now let's have our carpenter make our dwarves some nice beds. When the workshop is finished press [q] and move the cursor over the workshop to interact with it. We are going to [a]dd a new job; namely the construction of a [b]ed. But why only make one bed? Let's make seven, one for each dwarf.

When you have placed the orders then unpause and watch your carpenter grab wood from the stockpile and build some beds.

In addition to the beds we will also need 4 tables and 6 chairs. Add these orders when the workshop has room for them.


Step 4 - Underground Farming 

While your carpenter is building furniture now would be a good time to hollow out some underground farmland. Underground crops need to be grown on soil so you will need to designate a chunk of earth to be mined out on a layer of soil. Dirt, clay, sand, silt, and loam all count as 'soil' for the purpose of growing crops.

Once your miners have hollowed out a chunk of farmland you will need to [b]uild a [p]lot. Farm Plots are very different from other buildings and designations you have used so far. You need to adjust their size by using the [umkh] keys before placing them. You'll want at least one decent sized farm to start out.

If you accidentally placed a farm incorrectly you can delete it by going into [q] and moving the cursor over the plot, and press [x] to remove it.

Once you have your farm plot the way you like it, unpause the game and watch the farmers come and 'build' it.

When the plot is ready go into [q] and highlight the farm. You will notice that you have several options for crops. Use [+ / -] (plus and minus) keys to select Plump Helmets. This tells your farmers what to plant here in the spring time. What about the other seasons? Press [b] [c] [d] for summer, fall, and winter respectively and make sure that they are also set to plant plump helmets.

Why plump helmets you ask? Because it is a crop that can be used as food and alcohol with little effort. It also grows fast. There are other things you can plant, but plump helmets are the best when starting out.

Lets also put a stock[p]ile for [f]ood beside our new fields. That way our farmers won't have to go very far to drop off their harvest or to grab more seeds.

Note - Every time a dwarf eats or brews a plump helmet they create plump helmet 'spawn' (seeds) which will either be planted or stored for later. Plump helmets used to make 'prepared meals' via a Kitchen do not create spawn.

Congratulations! You now have a sustainable food supply!


Step 5 - Sleeping Quarters 

By now your carpenter should have built his beds and the miners should have hollowed out most of your underground design. It's time to move the beds into a room and designate it as a public bedroom.

First we will need to [b]uild a [b]ed in that room. Actually, why don't we put all the beds in that room for now?

When the dwarves have moved the beds and set them up go into [q] and hover over the bed in the center and press [r] to make a room. Use the [+ / -] keys to expand the size of the room so that all beds are within its radius.

While still in [q] mode hover over the newly created room so that it lights up and tell the dwarves that it is a [d]ormitory. This will let them know that no one dwarf gets to claim the room for himself. Anyone who is tired can use the beds within.

Congratulations! You now have a sleeping quarters!


Step 6 - Moving all the Stuff Inside 

Wouldn't it be convenient if everything was inside our new home? Lets make a great big Stockpile and put everything into it!

First press [p] for stockpile and then [c] for custom options. Here we can decide what gets to go in the stockpile. Well, we already have a pile set up for food beside the farms, so enabling food here would be redundant. Lets enable all other things though and place the stockpile. We can change the settings of this (and any other) stockpile by going into [q] and highlighting the stockpile.

Oh shoot, wait! We need to go back into the stockpile settings and disable stones! Have you seen all the stones laying around here? We don't want them in the stockpile, just all our starting gear. Lets disable stones. Ok, we're good now.

What about the wood stockpile outside? Let's get rid of it so that the wood goes inside. Go into [p] and select [x] to erase the wood stockpile outside.

And what about the carpenters shop outside? Well, we can't 'move' it so we'll have to deconstruct it and then rebuild it inside. Go into [q] and highlight the carpenters shop for options to deconstruct it and then build a new carpenters workshop underground!

All our dwarves should be hauling things inside now.


Step 7 - The Meeting Hall 

The meeting hall is where your dwarves go when they have nothing to do as well as new migrants who will come to live in your fortress. Lets set up a temporary meeting hall in one of our rooms shall we? Your carpenter should have made the tables and chairs in step three so let's [b]uild them in one of the rooms.

Once they have been placed, use [q] and hover over one of the center tables and like the designation of the bedroom use [r] to create a 'room' based on the table (a dining room). Use + and - to determine its size.

While still in [q] mode highlight the new dining room and use the prompt in the options to make it a meeting [h]all.

Congratulations! You now have a meeting hall!


Step 8 - Alcohol Production 

Dwarves actually drink more units of alcohol than they eat units of food and they get quite upset when they are forced to drink water, so lets set up some alcohol production.

First, we need to [b]uild a new [w]orkshop, namely a Sti[l]l. Let's put it beside the food stockpile with the farms.

When it is built, lets go into [q] and [a]dd the task of [b]rewing drinks. In fact, let's set that task to [r]epeat. Now, our dwarves will continue to brew drinks until either they run out of plants to brew or they run out of empty barrels to put the alcohol in. Since brewing plump helmets creates plump helmet spawn (seeds) we need not worry about using up all our food to make alcohol.

We do, however, need to worry about running out of barrels. Let's have the carpenter make us a bunch!

Excellent! Now we have a sustainable alcohol production!


Complete! 

Congratulations! You have a self sustaining outpost, the beginning of many greater things. You have also learned the basics of [d]esignating, [b]uilding, and [q], the bread and butter of playing Dwarf Fortress. Where do we go from here you ask? We enter Phase 2 - Establishing a Foothold.


Continue on to Part 5 - Establishing a Foothold

Dwarf Fortress 40_24 Tutorial: Part 5 - Establishing a Foothold

Explanation 

We have established the bare necessities in our self-sustaining little outpost. Now let's lay down some plans and build a permanent foundation for our future fortress. A fortress that will one day hold many dwarves, house efficient industry, extract riches from the earth, and become a trade hub for the human, elf, and dwarven nations. Let's set down the foundation for metropolis utopia that will be the envy of all our neighbors!

This tutorial will guide you in laying such a foundation by allowing you to work through different sections that build off the knowledge you acquired in Phase 1. These do not need to be done in the order that they are given, but they are all helpful for new players to understand.


Animals and Pastures 

You may have noticed that you have some animals wandering around your meeting hall. Let's zone off some pasture land so that they can graze on the surface and not starve to death where your dwarves are trying to enjoy their food.

First, lets go to the surface. You can zone off an area with [I]. Lets do that now. Zone off a large section of grassy land. Once you have selected the area you want zoned off and press [enter] you have the choice to tell your dwarves what type of zone you have just created for them. Using the options present in the [I] mode tell them that this is a Pasture.

Now, while still in [I] mode you can press [N] to tell your dwarves which animals belong in this pasture.

Note: this menu also allows you place other (less friendly) creatures that you own into a pasture.
Note 2: Enemies (goblins) who get stuck in a cage trap are considered 'creatures that you own'.


The Importance of Storage: Bins and Barrels 

Storage is extremely important for any fortress. Barrels are required to keep food, seeds, and alcohol. Bins can be used to store a lot of smaller items (clothes, crafts, gems, weapons, etc.) in one square of your stockpile instead of filling it up too quickly (this is especially useful for Finished items created at the Craftdwarf's workshop). We are going to need lots and lots of storage so lets have our carpenter get to work on some more barrels and bins.


Putting Rocks to Good Use 

Carpenters aren't the only ones who can create furniture. Masons can also create many of the things required around the fortress. Since rock is always more plentiful than trees and since we are fricken Dwarves, lets build a Mason's Workshop and put him to use making Doors, Tables, and Chairs.


Planning out the Fortress Proper 

Every fortress has three main areas.

  • Storage - Where resources and items are kept 
  • Industry - Where resources are used to make new items 
  • Residential - Where Dwarves go to sleep 


Even our tiny little fortress has these things. As we plan for a permanent fortress though, we need to consider where to place things so that dwarves don't have to run around a labyrinth and half way across the map in order to pick up the resource they need at their workshop.

For the purpose of this tutorial I am going to suggest a very simple layout that has each area as its own level in your fortress connected at several places with stairs.

Storage 
Have your storage level be the largest and fill it with different types of stockpiles. This is where all the wood and rocks will go for making furniture along with all cloth, gems, crafts, and all other items that your fortress needs and creates. Lining up these stockpiles with the workshops in the Industrial floor will make your fortress more efficient.

Industry 
Have your Industry level either directly above or below the storage level and place workshops appropriate to the stockpile they are near. (Carpenters Workshops close to where they can grab wood and drop off furniture, Jewelry Workshop close to where the gems are kept, Masons close to where stones are kept and where furniture is dropped off).

Consider building at least the following workshops to start off:

  • Carpenters 
  • Masons 
  • Craftdwarfs 
  • Leatherworks and Tanners 
  • Jewellers 
  • Clothiers 


* don't be afraid to make multiple of the same type of workshop,


Obviously you will not know precisely which workshop goes with which resources / items, but that is the joy of Dwarf Fortress, constantly learning and making things more efficient. Don't sweat it, you can make changes as you learn things.

Residential
Finally we have the residential area. Dwarves like to have their own rooms. The residential area will be where all these rooms are. Each room needs to be at least 3 but need not be more than 4 squares large and have a bed inside. Remember to [q] each bed to turn them into individual rooms. Dwarves will claim vacant rooms as their own.

Dwarves also get happy thoughts if their rooms are furnished with doors, cabinets, chests / coffers, or other more decorative items.

And of course, our meeting hall will need to be expanded to accommodate many dwarves eating and drinking. You could have it as part of one of your floors or make it its own floor until itself! Just remember that it will need close proximity to food / alcohol.

Feel free to proceed to the next section while your miners are busily carving our your designs.


Intermediate Stockpile Use 

You know how to use the basic Stockpile functions but did you know that you can also use the custom stockpile options to specify exactly what can and can not be stored there? Let's put these more advanced stockpile options to a practical use. We currently have one large food stockpile that has all food, alcohol, and seeds stored within it. Let's break it up into three stockpiles, one for food, one for alcohol, and one for seeds. The benefit of doing this will be that you will be able to see at a glance roughly how much alcohol is left and whether or not you need to brew more drinks.

It might also be useful to have a stockpile that only accepts empty barrels so that when all the food / alcohol from a barrel is consumed the empty barrel is removed so that you get an even more accurate reading at a glance. Let's put this one by the Still so that they don't have to walk very far to grab an empty barrel.


  • Hint: Barrels are considered a 'Furniture' item. 
  • Note: It is important to carefully read what you are disabling in the advanced Stockpile settings. Do not just disable everything in the Furniture submenus except for barrels. If you disable material types (for instance) then your stockpile only accept barrels made out of nothing and so all your wooden barrels would not be allowed in the stockpile. 


Take some time to wrestle through these settings, you will find them useful as you continue to play Dwarf Fortress.


Preparing for Trade 

At this point it is important to prepare to trade with your neighbors. The first Dwarven trade caravan will be arriving in Autumn in your first year (in addition to every year hereafter) and then you can expect elves in the spring and humans in the summer next year.

The first thing you need is a Trade Depot. Place this larger building outside on the surface so that the caravan wagons can access it.

The second thing you will need to do is create goods to trade. For the purpose of this tutorial build a craftdwarf's workshop (if you have not already) and set it to make rock crafts on repeat. This has a fourfold benefit to your fortress.

  • Ensures a supply of trade goods that you can use to barter with during trade. 
  • Cleans up a bunch of rocks from your fortress floor 
  • The craftdwarf earns XP in stonecraft skill so that future goods are worth more. 
  • It ensures you have 'ethical wares' to trade with the elves. If you offer them any wooden items during trade they will become very offended. 


The third thing you should do is name a Broker, someone who is the designated trader for your fortress. This is covered in Phase 3.

How to Trade and what to Trade for is covered in part 7


Prepare for Migrants 

It won't be long before your first wave of migrants comes to make your fortress their home. This means that extra beds should be ready and extra bedrooms assigned. It also means that your workforce will increase. Make a mental note of what jobs you can put new workers to when they get here. You can expect anywhere between 2 and 10 within the first wave.


Expanding the menu 

Plump helmets are nice and your dwarves will survive eating / drinking pump helmets till the end of time, but they will not be happy. You want to make your dwarves happy don't you? Let's expand the menu a little bit, or at least make plans to expand it once migrants arrive.

There are four methods of gathering food. I am going to outline them here and allow you the chance to choose one or two and figure them out.


  • Plants

    You are already acquainted with the basics of farming. There are several underground crops and even more overland crops that can be grown at different times of the year. Not all of them are for eating or brewing though. I'll let you do some searching online to figure out which ones are a source of food.

    During summer and autumn many trees will have fruit and nuts that can be picked by setting a forage zone (remember zones are made with [i] and that you will need to specify what type of zone it is) underneath them and keeping a supply of stepladders on hand.

    Another way to gather edible plants is to [d]esignate [p]lants to be gathered. Any useful / edible plants will be put into barrels and added to your food storage. This is a good way of acquiring overland crop seeds before you can trade for them.
     
  • Meat

    There are two ways to put meat onto the table. Both ways require a Butcher's Workshop and a dwarf with the 'Butcher' job enabled. Be sure to build a Tanner's workshop beside the Butcher's workshop so that the hide of the animal being butchered can be tanned into leather which does not go bad and can be used to make clothing / armor / other useful items. Also make sure that you have a Refuse Stockpile not too far away from the butcher (preferably behind a door and away from your dwarves) so that the bones + skulls can be kept crafts and items created from bones.

    The first way of acquiring meat is to designate one of your tame animals for slaughter. To do this, press [z] for Stocks and move to the Animal section. This will give you a list of all the animals in your possession and the option to slaughter them. Once designated the animal will be lead to the Butcher's shop and all its meat / body parts will be hauled to appropriate stockpiles throughout your fortress!

    The second way of acquiring meat is to have hunters. Sometimes migrants will already be hunters, they will come equipped with a crossbow, a quiver, and some bolts and will begin stalking the countryside for game to kill. They will bring their kills to the butcher's shop. Make sure that you have a stockpile of bolts ready to go so that your hunters do not run out. Note that overzealous hunting CAN (over time) permanently deplete the animal populations that visit your map.
  • Fish

    If you have any ponds, a river, or an ocean in your map then you can have your dwarves fish. Fishing requires no special tools, just to have the fishing job enabled. Build yourself a Fishcleaner's shop and your dwarves will be able to prepare the fish for eating.

    Stagnant ponds can be fished out but rivers and oceans cannot.
  • 'Prepared Meals'

    You can have your dwarves create 'prepared meals' out of the different ingredients available within your fortress by building a kitchen. You can add a job to prepare a meal from 1, 2, or 3 ingredients. Note that prepared meals do not yield seeds like eating or brewing do for plants.

    Some plants (like Cave Wheat and Sweet Pods) can be milled first to yield seeds and the resulting flour + syrup can be used as an ingredient for prepared meals. The process is a little long to explain but some basic research online will point you in the right direction.

    You can instruct your dwarves about which foods can be used for prepared meals by going into the stocks with [z] and then moving to the Kitchen tab. 


Keeping the Danger Outside 

If you chose a "peaceful" or "serene" location when you embarked then you won't have to worry about predators and nasty goblins for a while. But just so that you are prepared for when they DO come lets build a drawbridge at the entrance of the fortress and a lever to make it go up and down.

To do this you will need to [b]uild a brid[g]e and use the um/kh keys to set its size. Before you hit enter you will also need to set its raise direction using awsd keys. The little arrow represents which way the drawbridge will rise. You will want to place the drawbridge so that when it is up it blocks access to the rest of your fort. If danger appears on the horizon simply raise the drawbridge to keep it outside.

Once you set the plans down a dwarf with the Architecture job enabled will gather the supplies and build the bridge.

To control your drawbridge you will need to attach a lever to it. Levers (and attaching bridges to them) require mechanisms which are constructed at a Mechanics Workshop [b-w-t].

Once you have a lever and 2 extra mechanisms you will need to Q onto the lever to attach the bridge.

Take caution when lowering bridges... anything underneath will be crushed to death.

Take caution when your dwarves are upset... they may pull random levers when in a tantrum.


Where do I go if I don't know what I am doing or what something is? 

If you haven't found it already, the Dwarf Fortress Wiki will be your best friend. The Wiki has information on all objects, items, concepts, and mechanics and it is quite accessible. If you encounter something that you don't understand look it up on the wiki.


Complete! 

Congratulations! You now have the beginnings of a permanent fortress and the skills to handle most economic problems that you will encounter in Dwarf Fortress. You should have some migrants by now and a layout ready for industry. Now on to Part 6 - Taking Full Control with Dwarf Therapist, Bureaucracy, and lots of numbers! Don't worry, it might not be as boring as it sounds.


Dwarf Fortress 40_24 Tutorial: Step 6 - Dwarf Therapist, Nobles, and Numbers

You've established a foothold. You've learned a lot in a short amount of time. Your small outpost is self-sufficient and starting to take form. So far doing everything manually without worrying about assigning jobs, appointing nobles, or going too deep into the stock lists. You could theoretically continue playing without worrying about such things but learning them now will save you headaches later on.


Introduction to Dwarf Therapist 

Dwarf Therapist is an app that you can run parallel to Dwarf Fortress that allows you to manually set which dwarves will do which tasks. This can be useful for a number of reasons. For instance: making sure you have enough farmers to feed your colony; ensuring you have at least 1 dwarf assigned to essential tasks (brewer, farmer, butcher, tanner, wood chopper, carpenter, mason, architect, mechanic, etc); ensuring that your craftdwarves don't have to bother with hauling duty so they can keep crafting things.

Note that if you are playing with DF Hack enabled it will override any changes you make using Dwarf Therapist.

You can start up Dwarf Therapist at any time before or while playing Dwarf Fortress, simply minimize the game, find Dwarf Therapist in the Lazy Newb Pack Launcher and start it up.

If you're dwarves and their assigned tasks do not appear then click "Connect to DF" or "Read Dwarves" as the app does not read the game in real time.

Any changes you make to your dwarves job profiles will need to be saved by clicking on "commit to changes"

I personally find it most helpful to list the dwarves by migration wave... that way when you get 20 new dwarves you can quickly find them and assign useful tasks to them (since a legendary milker / grandmaster bee-keeper may be of more use to the fortress gaining skill as a farmer or mason...)

In addition to manually tweaking dwarves one job at a time you can also create templates to apply a specific list of jobs to dwarves quickly. If there are dwarves with useless skills I either assign them to work that will build useful skills or give them my customer made 'pleb' template which allows them to do basic hauling and manual labour while also showing me who gets to join the emergency militia to protect the more valuable dwarves.

For now just familiarize yourself with Dwarf Therapist. Play around with your dwarves' jobs and when you have them the way you like finish by clicking "Commit to Changes" and Dwarf Therapist will apply your changes to Dwarf Fortress.


Introduction to Nobles 

Nobles provide special functions to your fortress but can become a pain if their requirements and demands are not met. Open the [n]oble panel to take a look. Here you can see how many nobles you have and what they require / demand to keep them happy. You should have one noble already, the expedition leader, and your outpost is probably still small enough that he hasn't become mayor or baron to start making demands.

There are a variety of noble positions that you can appoint, and any dwarf can be appointed to multiple positions, just make sure that their schedule allows for enough time to fulfill their responsibilities.

For now I'm just going to cover the most important nobles for starting out.


  • Name a Broker – The Broker is your expert in trade. His / Her appraise skill will be taken into account when trading with caravans. Pick the dwarf with the highest appraise skill for this role.
  • Name a Bookkeeper – The Bookkeeper is who makes your stock lists accurate. It is also the only position with [s]ettings. You can choose anyone for this role, just make sure you set the [s]ettings to "all counts accurate." The bookkeeper will require an office. You can create an office by Qing over a chair and creating a room.
  • Name a Manager – The Manager allows you to queue up multiple jobs (up to 30) that automatically distribute themselves to existing workshops and notify you when the stack is complete. The manager doesn't need to have any specific skills but will require an office and I usually appoint the position to the Bookkeeper.

    To queue up jobs use j-m and press q then start typing the thing job you want done and the list will populate with options to choose from.

    To try this out lets mass produce the basics of 10 bedrooms. So that will be 10 beds, 10 rock doors, 10 rock cabinets, and 10 rock coffers. 


Other nobles may have specific needs (decent bedroom, 2 cabinets, meagre office, etc) and the larger your fortress becomes the more its expedition leader / mayor / baron / duke will need. Not fulfilling these needs makes the noble cranky and prolonged exposure to inadequate working conditions may lead to depression, bursts of anger, and tantrums. To keep demanding nobles happy be sure to build their living quarters extra large (5x5 is fine), designate that their rooms be smoothed and then engraved, and try to place high value furniture / decorations in their rooms. Item Value is determined by [base value] * [material multiplier] * [quality modifier]. (See Value in DF Wiki)

If you run into a situation where a noble claims he / she doesn't have their need met for a specific room try Qing that room and manually assigning it to that noble.

Eventually your leader will begin creating mandates which will either require you to make specific items or prohibit you from selling certain items.


Introduction to the "Z Menus" 

Pressing Z brings up the powerful Status Screen from which you have access to all of your fortresses inventory and statistics. I'll go through each panel briefly and why they are useful.

Animal - This panel shows all the animals / creatures that belong to your fort. Animals that are not pets (stray) can be butchered for food / leather / bones. Some animals can be trained for hunting or war. Animals can also be adopted as pets except for cats who do as they please and adopt dwarves instead.

Kitchen - Here you can tell your dwarves what to brew into alcohol and what to cook in the kitchen. Why does this matter? It matters because plants that are cooked do not drop seeds whereas plants that are brewed (or eaten raw) do drop seeds. Some seeds can also be cooked or brewed which, depending on the amount you have on hand, may be helpful or unhelpful.

Typically I try to keep seed producing plants out of the kitchen to ensure that the fortress doesn't accidentally find itself all out of strawberries and no way to get more until more seeds can be found / traded for.

Stone - This panel allows you to control which types of stone masons can use. By default stones with a purpose besides that of masonry are not used. (by default stones that contain ores are not used for masonry)

Stocks - This panel provides you with a full inventory of the fortress. Every item is accounted for here. If using DF Hack you can search the stocks with [e] and find what you are looking for quickly. This panel also allows you to label items as Forbidden (dwarves will not touch it) or unforbidden. You can also label items for smelting.

Hunters and crossbow dwarves who miss their targets will not retrieve the fired bolt as it defaults to forbidden. It is worth checking the stocks everyone once and a while to unforbid bolts that lay strewn about the countryside.

Health - If you have a chief medical dwarf noble assigned then you will be able to see the health of all of your dwarves in an instant and what the doctor recommends to treat them. More on this later...

Justice - If you have a sheriff or captain of the guard then the justice panel will become available. This panel displays the number of cages and chains (including ropes) available for the purposes of meeting out punishment for criminals. It also displays known criminals and their punishments.


So, you now have Dwarf Therapist running the background and some new nobles to help run things in the fortress. Have we reached information overload yet? Don't worry too much, this is just a 'make you aware of' tutorial. Play around with what you've learned before continuing on to the next part.


Continue on to Part 7 - Trading

Dwarf Fortress 40_24 Tutorial: Part 7 - Trading

Welcome to the Trading part of the tutorial. Whether you've completed everything up to this point your you've jumped ahead because there is a caravan on your doorstep, it's all good. By the end of this section you should have a working knowledge of how to trade along a general direction for what sort of things you should look for when trading.


Alright, so the first caravan that you can trade with arrives in autumn of your first year. In order to trade you will need to [b]uild a [D]epot in an area that caravans can access (trade carts are 3x3).

You will also need to assign a Broker for your fortress using the [n]oble screen.

Once you have a broker q over your trade depot and ensure that the broker is the only one who is allowed to trade. Why? Because dwarves without appraise skill should not be trading.

When a caravan arrives on the map they will make their way to your trade depot and set up shop for a while.


To trade with a caravan you will need to: 


  1. Q over the depot and tell your dwarves to move [g]oods to the Depot for trading. (You will want to bring any finished goods ie: rock crafts)
  2. While still Q'd over the depot [r]equest your designated trader to get himself over there.
  3. Once all the goods and your trader are present you can [t]rade
  4. On the left screen is what the caravan has to trade, on the right screen is what you have to trade. Peruse what the caravan has and select things you would like. Then go over to the right screen and select what you are willing to give in return. The caravan will want to make a profit which means you will need to ensure that the value of trade is in their favour by a half decent margin.
  5. Once you have selected the items you want and the items your willing to give you may attempt the [t]rade. The caravan will either accept, refuse, or make a counter offer.
  6. After the trade has been made you will need to press [g] again and tell your dwarves to bring everything back from the trade depot to put into your stockpiles. 


What sort of things should I trade for? 

As you may have noticed (or will notice soon) caravans bring a lot of good with them and sorting through them all can be a little daunting for the first few times. For your first trade try to get all of their lignite + bituminous coal (if you don't have these rock types readily available), at least one bin each of leather, cloth (wool), cloth (silk), cloth (pigtail), thread (wool), thread (silk), thread (pigtail), and maybe some inexpensive iron weapons / armor.

Why?

  • Lignite and Bituminous Coal are very cheap and can be smelted to create 9 units of fuel each. This will be very useful when you start into metalworking.
  • Leather / Cloth / Thread serve several purposes. They can be used to make bags, clothing, ropes, and crafts which are useful for your fortress can be resold at a higher price. Try to get keep a variety in stock though as sometimes dwarves are taken by strange moods and are compelled to create strange and mysterious objects using a variety of base materials. If such a dwarf is unable to find all the materials they will go insane and die. I always try to keep at least 2 units of leather and every type of cloth and thread at all times. 


Later on when you have more experience in how the various industries work you will want to purchase things tools / items that you need but are difficult to get or base materials to use in those industries as the resulting items and trade goods are either useful for your fortress or can be purchased at a higher price.

Example: purchasing uncut gems for your jeweler to cut will net you an income.
Example: purchasing cloth for your clothiers to make pants will net you an income.
Example: purchasing raw foods for your cooks to prepare as lavish meals will net you a (surprisingly good) income.

To keep costs down try to only purchase raw materials that you can produce things from. Need a rope / chain? Don't buy the item itself, buy the cloth / metal bar and have your dwarves craft it instead.

When you have materials to keep your industries going or just so much extra that you have value to burn then you can stock up on extra armour, weapons, exotic / ferocious animals, or valuable knick-knacks to keep vain nobles happy.

So to wrap up.

  1. Things you need 
  2. Things you can make a profit from 
  3. Things that are cool 


Things to keep in mind


  • Never offer wooden items to elves... they become very insulted. 
  • A diplomat may accompany dwarven caravans and talk to your leader in order to make negotiations for future caravan stock and prices. Raising the amount you are willing to pay for certain items will mean the caravan will bring more of them. Paying attention to what sort of things the caravan is willing to pay more for next year can prove very valuable. 
  • Elves trade in the Spring, Humans in the Summer, Dwarves in Autumn. (if they don't come then it might be because you chose an embark location that they can not get to) 
  • You will eventually want to either wall off or move your trade depot somewhere safer as thieving vermin and raiding parties like to follow along behind and steal goods. 
  • If goods are stolen from a caravan you are responsible for them. 
  • If a caravan is detained for too long the merchants and guards will start to go crazy. 
  • Caravans can enter or leave via any route to / from the edge of the map. 
  • Giving caravans a good deal will increase the amount of goods they bring next year and increase the likelyhood that migrants will come to your fortress. 
  • It is wise to purchase otherwise unattainable seeds from merchants as the new crops will result in food / drink variety which is sure to increase dwarven happiness. 


That should be enough to get you trading. If you have any questions you can find a more in depth description on the wiki: http://dwarffortresswiki.org/index.php/DF2014:Trading


Continue on to Part 8 - Basic Defense

Dwarf Fortress 40_24 Tutorial: Step 8 - Basic Defense

So you're little outpost has grown, your dwarves have started generating wealth, and its only a matter of time before your neighbours get greedy. Hopefully you aren't under attack right now (if you are then skip right down to militia). The military features in Dwarf Fortress are probably the most complicated things you will ever have to deal with in this game... I have tried to break the material down as best as I can.

Here are some things to add to your fortress to prepare for conflict.


Assign Burrows 

Burrows are designated areas that restrict dwarves to only doing jobs and using items within the designated area. You can assign specific dwarves to specific burrows if you like but for now let's just create one burrow that extends to everywhere inside your fortress. That way when enemies come to visit you can just call a civilian alert and all your dwarves that are above ground will run into the fortress where they will be safe.

To create a burrow you will need to use [w] and then [a]dd a new burrow to begin defining it. When done [n]ame it "inside".

To get your dwarves into the burrow you will need to create an alert and toggle it active.


  1. Select [m] for military and then [a] for alerts 
  2. [c]reate a new alert and give it a useful [N]ame (ie: Underground) 
  3. Now move the cursor to the far right column, which should have the burrow you just created, and hit Enter to associate that burrow with your new alert. You'll see a green A next to the burrow when you have that alert selected. 


Any time that you want your dwarves to run underground open [m]ilitary, choose [a]lerts, and select the alert you just created.

http://dwarffortresswiki.org/index.php/DF2014:Civilian_alert


Walls + Drawbridges 

The quickest way to ensure bad things do not get in to where your dwarves are is to build walls and drawbridges that can be raised to act like walls.

Wall are simple. Nothing goes through them (although some enemies can fly over them). They block creatures, liquids, and projectiles. If you have grazing fields or over-land crops it might be a good idea to put a wall around them.

You can build walls using [b-C-w] and then define their size using umhk. When deciding which material to build the walls out of always try to use stone blocks as this reduces construction time by like six hundred percent. Stone blocks can be crafted at the mason workshop, 4 blocks per 1 rock, and these blocks can be stored in bins.


Drawbridges are very useful both at blocking enemy movement and smashing enemies into bloody bits and dropping their broken bodies 500 feet down onto spikes harming enemies. To create drawbridges use [b-g] and set the size using umhk as well as the direction you want the bridge to raise using asdw.

To raise your drawbridge you will need to build a lever using [b-T-l]. It will require mechanisms which are constructed at a mechanics workshop. If you q over a lever you will be able to [a]dd a function (like connect the lever to a bridge for instance) which will also require mechanisms. Once your lever is connected to your bridge pull the lever to see how it works.

A word of caution though, anything on the bridge when it goes up will be thrown into the air and then fall to the ground. Anything under the bridge when it goes down will be atomized.

Another word of caution. Tantruming dwarves will pull random levers...

Don't under estimate the power of well placed drawbridges. They can drop enemies into pits, crush them to pieces, or activate a drowning chamber.


Traps 

Mechanics can use mechanisms and other items to create a series of automated traps that will trigger when an unfriendly creature steps on the trigger tile. You can find these under [b]uild and then [T]raps. Please note that these traps only trigger once and then need to be reset before they will trigger again.

For the purposes of this tutorial build lots of cage traps around your entrance. Weapon traps requires iron and steel weaponry which we do not yet have. Cages can be constructed out of wood and effectively serve the same purpose as weapon traps in that the enemy is neutralized.

Caged enemies are stored in 'animal' stockpiles and can either be safely sold and carted away or released in a controlled environment for your militia to gain combat experience.

Here is a link explaining how to disarm enemies in a cage: http://dwarffortresswiki.org/index.php/DF2014:Cage#How_to_disarm_hostiles_in_cages

Here is a link for a full explanation of simple and advanced traps.
http://dwarffortresswiki.org/index.php/DF2014:Trap_design

Note: Kobolds are tricksy little sneaks who do not set off traps when they move over them. Thankfully kobolds are also cowards who run away when they are spotted but will still try to steal things your fortress. Keep your valuables away from the entrance and make sure that you claim all your gods back from the trade depot...


The Militia 

The Militia... your best, bravest, and boldest. The militia is your standing army. You can give them orders to move about the map and engage your foes. If you give them a barracks and weapons they will train to increase their martial skill.

To create a squad go into the [m]ilitary screen and select [s]quad. Assign dwarves that either have good combat skills or dwarves you don't mind dying in horrible horrible ways putting in harms way.

Once you have a squad you can give them orders from the same screen [m-s].

To build a barracks you will need to build and place either a weapon stand or armour stand and q over it.

Once you have a barracks you will have to assign it to a squad in order for them to train.

The options and mechanics in the military screen are varied and complicated and this is the absolute most basic introduction. For your first fortress just create a small squad, let the train in a barracks, and use them to kill enemies / random animals to get a feel for how the basics work.

Later you should review the very well written full explainations for military in the Dwarf Fortress Wiki: http://dwarffortresswiki.org/index.php/DF2014:Military


Continue on to Step 9

Dwarf Fortress 40_24 Tutorial: Step 9 - Next Steps

This is the end of my tutorial. By now you should have a pretty decent grasp of the basics and could probably do just fine exploring and experimenting on your own. Here are some options for what direction to go next. Peruse the following sections and pursue or ignore each as you see fit.


Metal Working 

This is an industry that you do not want to ignore. Metal working allows you to smelt ore-bearing rock into metal bars and then use the metal bars craft your own copper / iron / bronze / steel tools, weapons, and armour, as well as create items, art, and decorations from precious metals.

Clear a large area in your fortress and prepare 1 stock pile per ore-bearing rock you intend to refine into metal bars, 1 stock pile per metal time, 1 stock pile for charcoal and coke (fuel), and 1 stock pile for wood or lignite / bituminous coal.

Build at least 1 wood furnace, 1 or 2 smelters, and 1 or 2 forges.

You will need the wood furnace to turn wood into charcoal which acts as fuel for both smelting and crafting.

Once you have some charcoal in stock you will be able to use your smelters to either refine metal ores into metal bars or turn lignite / bituminous coal into 9 bars of coke (same properties as charcoal).

If are fortunate to have iron ores (hematite, limonite, magnetite) then you can begin crafting suits of armour, weapons, and tools.

If you don't have iron then copper armour is still better than leather and if you have both copper and tin then bronze is about the same as iron.

If you are very fortunate and have an accessible source of magma then only build 1 or 2 magma smelters and 1 or 2 magma forges one Z level above the magma with the centre tile channeled out. Magma smelters and magma forges use magma (an infinite fuel source) do not need charcoal / coke.


Cloth 

Being able to create your own cloth will allow you to craft your own bags, bandages, ropes, clothes, and quivers. Depending on the skill of your weavers and clothiers this can become a very prosperous trade and additional value can easily be added by using dyes.

This is a good industry to set up, even if you don't use it too much. Your dwarves' clothing will eventually wear out and they really don't like being naked. Additional bags are good to have on hand to store your ever increasing quantity and variety of seeds, dyes, and will be required to harvest sand if you ever do glassmaking. Rope is useful for placing restraints for guard animals or prisoners.

Cloth making requires at least 1 Loom which turns thread into cloth. To create cloth items you need at least 1 clothier's workshop.

There are 3 types of thread, each of which is acquired differently:

  • Plant Fiber – from crops (pigtails / rope reed / other) that are processed at a Farmers Workshop. 
  • Silk – from spider webs. The 'gather webs' job is automatically activated from your looms. 
  • Yarn – from wool which can be acquired by shearing animals at the Farmers Workshop. 


Thread and cloth can be dyed to change their color and increase their value. To dye your cloth you will need a Dyer's Shop and bags of dye.

To create bags of dye you will need to have a quern or millstone set to process plants, empty bags, and plants that can be crushed into dye. The process creates 1 bag of dye as well as seeds of the plant that was crushed.

Dyes are as follows:

  • Midnight Blue (Dimple cup) 
  • Emerald (Blade weed) 
  • Redroot (Hide Root) 
  • Silver (Silver barb) 


Note: Querns and Millstones don't allow you specify which plant to crush and so you may end up with multiple types of flour instead of dye. To overcome this check out the Wiki's expanation: http://dwarffortresswiki.org/index.php/DF2014:Quern


Glass 

A potentially luxurious industry provided you have access to sand and a source of fuel (magma is ideal). Glass can be used to create nearly everything that can be created by a mason in addition to creating vials, crafts and providing Jewelers with 'raw glass' which can be cut and then used just like other gems.

There are 3 types of glass that can be created.

  • Green Glass – made from sand – x2 value modifier 
  • Clear Glass – made from sand and pearlash – x5 value modifier 
  • Crystal Glass – made from rock crystal and pearlash – x10 value modifier 


Glass is created from a Glass Furnace or Magma Glass Furnace and will require a source of fuel. Sand can be purchased or collected in bags. If you have sand on the map you can create a zone [i] and designate it for sand collection. You can then queue up "collect sand" jobs from your glass furnace(s). In this way green glass is a very easy resource to create and is worth twice as much as common stone.

Pearlash can also be created if you have a lot of trees to burn. Start by burning wood at a Wood Furnace into ash. Use the ash to create potash at an ashery. Refine the potash into pearlash at an ashery.

Rock crystal is a gem that is either mined or purchased.


Food 

Making 'lavish prepared meals' in the kitchens can be very profitable as each ingredient used takes on the value multiplier of the skill in which it was chopped, diced, or cooked. The more variety of ingredients you have the more likely a dwarf will gain happy thoughts from eating a meal that was prepared with one of their favorite foods. Bare in mind though that plants used in the kitchen do not produce seeds.


Healthcare 

While not technically an industry building a hospital is still something you should consider. Without a hospital wounded dwarves are carried to their rooms where they rest until they can work again, possibly taking days or months to recover depending on the extent of their injuries. A hospital will speed up the healing process and ensure that appropriate procedures are done to ensure that injuries heal properly and that nobody dies of infection.

To create a hospital simply create a new zone [i] and designate it as your hospital.

Fill it with the following objects:

  • Beds for injured dwarves to rest in. 
  • At least one table for doing surgeries 
  • At least 2 Containers (coffers, chests, etc) to fill with supplies 
  • Traction benches to handle 'compound fractures' 


Important: Ensure that your fortress has a well. Injured dwarves can only drink water. Wells can be placed above any source of water (even stagnant water) and will magically purify any water that is drawn from them. Also ensure that you have a supply of buckets so that water can be retrieved for injured dwarves.

To properly stock your hospital with supplies you will need the following:

  • Splints and crutches 
  • Cloth (for bandages) 
  • Soap 
  • Plaster Powder 


Important: You will need to assign a chief medical dwarf within the [n]oble panel. Ensure that all medical tasks are checked on in Dwarf Therapist.


Other Industries 

See other possible industries on the wiki at: http://dwarffortresswiki.org/index.php/DF2014:Industry


Overland Fortifications 

If you haven't already done so consider walling around the entrance(s) of your fortress. This will ensure that you can plant and harvest above ground crops in peace and keep your herds clear from bloodthirsty meanies.

Consider also building a tower from which marksdwarves can keep a watchful eye for thieves and ambushers and then rain down death upon your enemies.

If you are adventurous try constructing siege towers with ballista or catapult.

Consider also building a network of traps and bridges to deal with enemies before they get close to the true entrance of your fortress.


Rethinking Logistics 

What is the max population set for your fortress? Do you think your food and alcohol production will keep up with 200 dwarves? Will your dining hall(s)? Best to ensure production is increased before you run out.


Exploring the Deep Places of the World... 

The types of rock, metals, and gems within the earth change as you break through to new layers. Think of the riches you could uncover. Somewhere deep down there is the magma sea, an entire ocean of infinite fuel for smelting and crafting!

There are also tales of dark caverns, forgotten beasts, and unspeakable evils but those are just stories and probably not true. You should ignore them. Think of the riches...


Prepare for the Inevitable 

Eventually dwarves are going to die. Whether it be in battle, a mining accident, vampires, old age, or some form of insanity you will need to have a burial chamber with coffins at the ready so that friends and family may properly grieve and the spirits of the dearly departed can rest in peace.


Being Awesome 

Make your fortress awesome. Smooth the stone and engrave everything. Replace simple furniture made with common stone with exceptionally well crafted furniture studded with gems and inlaid with precious metal. Build statue gardens and waterfalls. Keep a trophy room full of artifacts, stacks of coins, exotic beasts in cages, and disarmed siege leaders on display. Cover everything with gold, silver, and gems. Make your fortress a Dwarven heaven overflowing with riches and good food and drink.


Let the Games Begin! 

Build an arena that you can toss captured enemies into. Depending on your preference you may want to give your marksdwarves some target practice or feed a fortress 'pet' or test out a new trap configuration.

Greg Recommends Dwarf Fortress

Price: You're Soul Free!

Dwarf Fortress is one of my favorite games of all time. If you enjoy deep mechanics and feel the urge to try something unorthodox then give this game a download (it's free) and, if you can figure out the controls, you'll be in for a wild ride.

Dwarf Fortress is not for everyone... I think it's actually only for a very few. If you can become even mildly proficient at Dwarf Fortress then you will have joined an elite fellowship in the upper echelons of PC gaming geekdom. The game is brutally difficult, it only has ASCII based graphics, the UI is like hard coding a computer language, and the game itself has lots of bugs. Why would I recommend this game and why is it one of my all time favorites? Two words. "Mechanics" and "Details" Oh sweet mercy the mechanics and detail of this game are the deepest, widest, and most amazing in the world for any video game ever.

A small snipped of a world map. This is a stunning view of the antarctic polar cap moving into tundra, serene cold plains, coniferous forests, deciduous forests, hills, mountains, freshwater swampland, and treacherous oceans. You can also see a desert in the west and just north of the desert is The Hammering Star (dwarven nation).
Dwarf Fortress is an ongoing project constantly being built and updated by Bay 12 Games as a labour of love since 2002. Originally a rogue-like indie video game Dwarf Fortress has become its own genre of game with nothing else quite like it.

When you start Dwarf Fortress for the first time you will need to create a world to play in. For other games this takes only a few seconds, for Dwarf Fortress it can take minutes and will put your computer's processor through its paces. Each world created involves creating every individual character and every monster in that world and a simulation is run for a period of 50 - 5000 years wherein these individuals and monsters live life and every event changes the characters and is recorded. By the time you get to enter the world it already has a unique history filled with kingdoms, cities, towns, villages, families, and individuals who have worked together, fought each other, loved, quarreled, developed likes and dislikes, fortunes and fears, works of art and powerful artifacts.

You can play in three different modes. Fortress mode puts in charge of an expedition of dwarves where you pick a location in the world, travel there, and build a home. Adventurer mode allows you to create a single character to go throughout the world in a rogue-like RPG adventure. Legends mode allows you to view the various locations and history of the world.

Embarking on an expedition in The Universe of Enchanting to The Velvety Hill in The Jade Horn-Land, a warm savanna with fertile soil, clay for making earthenware, and rich in metals but an aquifer will make mining very difficult. The settlement will be on a stream named The Dear Wanderer surrounded by wilderness. If you press tab then you will be able to see who your neighbors are, a break down of the elevation, and the presence of other biomes that may not be readily apparent.
Fortress mode is where I give Dwarf Fortress all my recommendations. You start out with seven dwarves, a wagon with the supplies you brought along, and the clothes on their backs. Each of these dwarves is a unique person with their own skills and attributes, likes and dislikes, family connections and phobias, hopes and dreams. You must ensure that their needs are met or they will become unhappy and throw tantrums or get sick or die. There are an awful lot of things in Dwarf Fortress that cause death... dehydration, hunger, sickness, poison, drowning, lava, lions, bears, tigers, goblins, dragons, titans, giant spiders, carp, cave ins, and the terrible terrible things that live in the deep places of the world... best to start preparing early.

You are going to lose this game a lot, but as everyone in the DF community says "losing is fun!" My first half a dozen fortresses came to wonderfully terrible ends, getting butchered by goblins, minotaurs, zombies, or dying of starvation.

Once you establish a self sufficient outpost and your dwarves are safely underground you can start focusing on digging deeper, constructing individual rooms for your dwarves, and start up one or several of the many manufacturing chains to create necessities and items for trade. As your wealth grows migrants (and enemies) will be drawn to your outpost and you will have to figure out what to do with them. Migrants may have useful skills that can greatly benefit your industry (jewel crafting, farming, weapon smithing, glass making, etc.) or they may have useless skills (cheese making, milking, glazing) in which case I volunteer them to join the militia. Enemies should either be locked out of the fortress, captured, or killed.

Everything in Dwarf Fortress, every dwarf, every monster, every barrel, tree, rock, weapon, plump helmet has a dizzying amount of stats associated with it and can be used for any number of things. The options are so many, the scope so large, and the mechanics so deep and the fact that you are playing in 3 dimensions on a 2 dimensional map is so confusing at first that everyone playing will get lost in what to do, and provided you know what to do you will probably also get lost in how to do it because there are just so many options available. Thankfully caring Dwarf Fortress super geeks have put together what is called "The Lazy Newb Pack" which adds better graphics, extra Dwarf Fortress apps, and quick start builds to make playing the game easier and the DF Wiki which you will act as your textbook for how the varying characters, constructs, systems, and goods all fit together.

A basic self-sufficient outpost mined into the side of a hill. Farms for food. Breweries for drink. Beds for sleeping. Craftworks and plenty of good stone for trade. Masons and carpenters for constructing furniture and walls. Traps at the door to dissuade invaders and thieves. A trade depot. All of this brought to you by the Phoebus tileset graphics pack.

There is something very satisfying about making the pieces fit together and watching your little dwarves go about their lives. Planting seeds, harvesting crops, milling them, brewing them, preparing lavish plump helmet roast garnished with lettuce leaves chopped prepared reindeer liver, and finely diced river berries, having a lucky dwarf grab that meal, make her way to the legendary dining hall, and gain all manner of happy thoughts for eating a majestic meal in a legendary dining hall while chatting to her friends and admiring the fine craftdwarfship of the tables and chairs.

Turning layers of solid rock into an intricate community of dwarves who go about their lives is fun in the sense that building and watching an ant colony is fun, but dwarves aren't ants, their proud, stalwart, greedy, and ambitious. It isn't enough to just cut out a deep home in the roots of the mountains so that they can eat and sleep and admire the furniture. Dwarves take pride in their crafts and love to display their wealth! Take those fine tables and chairs and inlay them with silver and cerulean gemstone. Cover the walls with carvings that display the proud history of your race and your home. Create works of power and beauty. Dig deep, find the valuable ores and gems, pave your home in gold and gems, and brain any goblin hoard or monster who thinks they can take what you've laboured to make.

They will be coming, the hoards of greedy monsters who will storm your home, murder your dwarves, and try to claim your riches for their own. You must prepare for them. Build walls with strategic drawbridges, setup safe zones for your dwarves to stay in when they are under attack, assign a militia, cover them in armour and weapons, set falling rock traps, pitfall traps, cave-in traps, weapon traps, cage traps, drowning traps, lava traps, angry bear traps, ballistic traps, crushing traps... the list of what you can prepare with goes on... Or you can skip the traps and let your militia go toe to toe with the invaders. The fight mechanics, like everything else in Dwarf Fortress, are incredibly deep and complicated and it is well worth reviewing the combat logs for a full description of what happened because what you see in real time happens so fast it's hard to decipher what all the flying pixels and red means.

A grisly combat log between the player and a bandit leader in Adventure Mode. Fortress mode
combat logs look like this but with more combatants.

In my first fortresses combat did not work in my favor for a variety of reasons. I hadn't figured out how to properly assign a militia and my drawbridges were set to retract instead of raising to  block off a passageway. My poor dwarves got butchered in the first four years. I've come a long way since then and in my most advanced fortress goblin sieges and random monsters are a valuable source of income. Monsters can be captured, tamed, and used as 'pets', some can even be trained for war. Goblins, even when out numbering me 5 to 1, get torn to shreds by a well trained steel clad militia... it's like a wrecking ball hitting a house of cards. Their shoddy weapons and armor can be smelted down and used to create useful and valuable things. Just for the fun of it I smelted down the weapons and armor of my goblin siegers into pikes, made a deep deep pit, put the pikes at the bottom of the deep deep pit, then dropped the goblin prisoners into the deep deep pit onto the pikes they had so graciously provided the materials used to smelt them with. That's what you get when you start an unprovoked war on the dwarves! Future prisoners will get to compete in a death arena against all the beasties my dwarves have captured (or purchased from exotic caravans) and if they manage to survive, may attempt to run "The Gauntlet of Grisly Death" in a bid to reach the surface while their captured leaders are forced to watch from their display cages in the trophy room.

The more wealth and the larger your fortress the more enemies will try to tear it down, eventually attracting Titans, Forgotten Beasts, and other things deeper, darker, more sinister, and more powerful than anything else you have encountered...

But hey, "Losing is Fun!" and long before you reach the end game you have lots of other things to keep you occupied like "where am I going to put all these new migrants?" "why has one of my dwarves stolen the craft workshop and constantly repeating cryptic words?" "what is an artifact and why do I want them?" "why is all the rum gone?" "how do I build a well?" "if I seize all of the Elvish goods will they attack me?" "why would I want Elvish goods?" "I must control the river." "who needs a watch dog when you can have watch bears!" "why do the animals keep dying?" "how do I create a grazing area and how do I assign animals to it?" "get back here you blasted Kobold!" "is there a vampire in my fortress?" "how do I get rid of these annoying nobles?" "Where did that blasted Pigtail Fiber Mitten get to?" "what do you mean I can't make goblin bone crafts?" "What is the proper ratio of farmers to brewers in a community of my size?" "Hey a huge underground cave!" "Lava!?" "Magma smelters!" "Smelt all the things!" "Dwarfy McDwarftington likes granite, sapphires, and cows... what is the best way to fill his room with all of these things to make him a very happy dwarf?" "Why are my dwarves wandering around naked?"

A simple flowchart for the beginner DF player.
The more advanced Dwarf Fortress players will find fun in assigning specific dwarves to do certain jobs and in the logistical options for what stockpile will accept which types of goods and which workshop will draw from which stockpile. The sorting options are their own world of a dizzying amount of options but sometimes, for the sake of absolute order and efficiency and the greatness of the dwarves, such challenges must be met. Thankfully The Lazy Newb Pack includes an automation option that makes managing dwarf jobs and maintaining inventories am easy and painless process for all but the most enthusiastic of micromanagers. Painless, that is, assuming that you've gotten used to the text based user interface that feels like a crazy uncle to the cmd.exe.


Once you overcome the learning curve you can have a lot of fun with Dwarf Fortress, and depending on your personality type overcoming the learning curve may be part of the fun! It's definitely not for everyone though, and that's just fine. The game industry is full of corporations that put out games with 'broad appeal' to sell the most copies possible to make lots of money. Dwarf Fortress is a refreshing labour of love created by two brothers who have a vision of something great and unique. What caught me off guard when I was learning how to play was how much personality came through the mechanics and how vivid the non-graphics can be. The review is getting long but please allow me to share a story or two more.

I was looking at the surface layer and noticed a small letter 'c' and a green dot moving about. Unsure what this was I paused the game, pressed 'k' which is the command for 'look' and hovered over the c. It was a cat (male). I hovered over the green dot. It was a firefly. The cat was chasing the firefly in the meadow. I thought that was pretty cool and wondered at what point the programmers decided to write that particular algorithm for cats chasing fireflies. Then I marveled at how the cat managed to get out of the fort in the first place because all the doors were securely locked and had been for some time. Further investigation revealed that cats are not adopted by dwarfs (which is odd considering that dwarfs can adopt pets) but rather dwarfs could be adopted by cats. Oh my. But here's the thing that really impressed me, while I saw the minimalist graphics of a 'c' and a green dot moving about through the 'O's (tree trunks) and other pixels representing various plant types I could see the cat and the firefly in my mind's eye, the chase somehow vivid in vibrant colors, an orange cat in a sunny meadow full of green grass and daisies waving in the wind, a bright spot amidst the cool shadows of the thick pine trees all around. Now, obviously my mind created this image but I wasn't expecting it to and somehow, for me at least, the minimalist graphics can become more impressive and immersive than high budge AAA graphics engines. When talking to other DF players I found that some of them have had similar experiences.

My other story involves an evil 'g' (goblin) thief who jumped one of my overland farmers and then took off towards the edge of the map. The militia were training nearby and I ordered them to attack before the nasty little rodent got away. Normally dwarfs and goblins move at the same speed but one iron-clad master hammerer ran past all the other dwarfs, caught up to the goblin and pixels flew everywhere with lots of smashing and squelching noises, more than one would think are required to kill an unarmored goblin with a war-hammer. I checked the combat log and it turns out that the goblin had attacked the farmer with a silver dagger, lacerating his right hand. The dwarf who managed to catch up the the goblin was the farmer's brother (interesting) who struck the goblin on his right hand over and over and over again with his silver war-hammer, first cracking the bones, then breaking the bones, then shattering the bones, until the hand was destroyed (bits and pieces flying to adjacent tiles) before landing a killing blow to the head. Was the brother inspired by rage to exact this sort of grisly vengeance or was this all just chance? I don't know. But wow, the amazing things that can happen when you have mechanics as deep as Dwarf Fortress.

Now there's one more thing about Dwarf Fortress you need to know. It's not finished yet. It will probably never be finished ever. It's a continually growing and evolving project with updates and new versions coming out every few months adding new features, fixing bugs, and creating whole new bugs. Considering that this game is already more complex and has more features than most finished games this really works to its advantage. There is also a vibrant modding community so you can dive into fan-generated content (which is actually really good) should you ever find 'vanilla Dwarf Fortress' to easy.

If you are the least bit intrigued then download the Lazy Newb Pack (it's free) and check out my Dwarf Fortress tutorial.